How to automatically redact sensitive info from screenshots
The Jumpshare desktop app automatically detects sensitive information (email addresses, passwords, IP addresses, and credit card numbers) in screenshots and lets you hide it all with a single click within the annotation window.
📌 Automatic Redaction is currently only available on Windows but is coming soon to Mac!
Here's how this feature works.
1. Launch Jumpshare and select Capture to take a screenshot. When you’re done, your screenshot will be opened within the annotation window.

📌 To open an existing image in Jumpshare's annotation window, right-click the image and select Annotate with Jumpshare from the context menu.
2. If sensitive info is detected, the Redact Sensitive Information icon will appear in the toolbar at the top of the window. Click this icon to hide all detected sensitive information behind editable redaction marks.
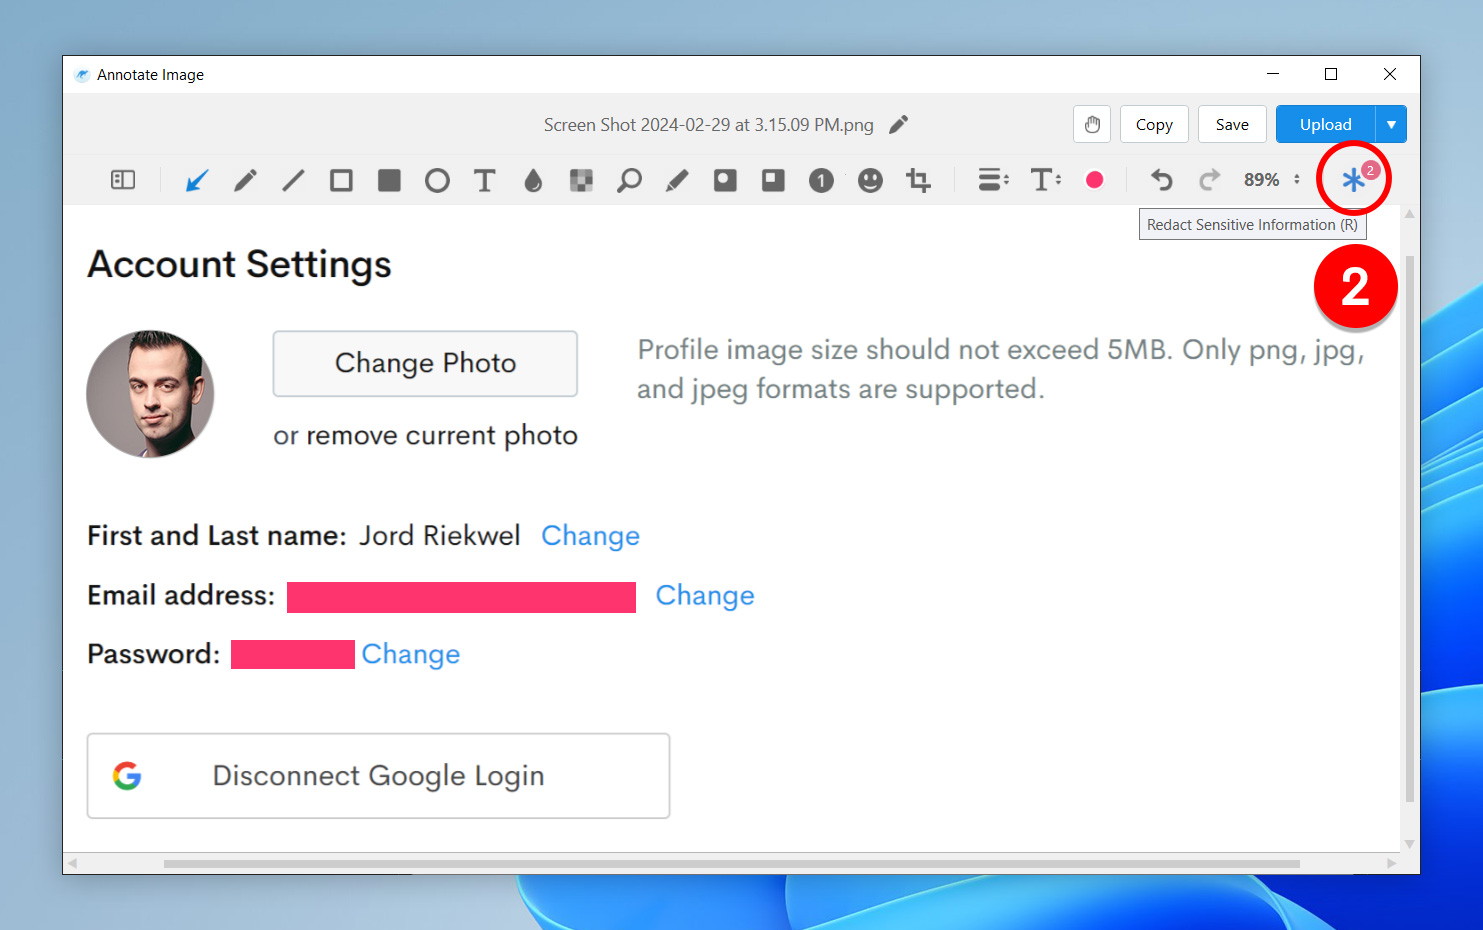
📌 The badge on top of the Redact Sensitive Information icon shows the number of instances of sensitive information detected in the screenshot or image.
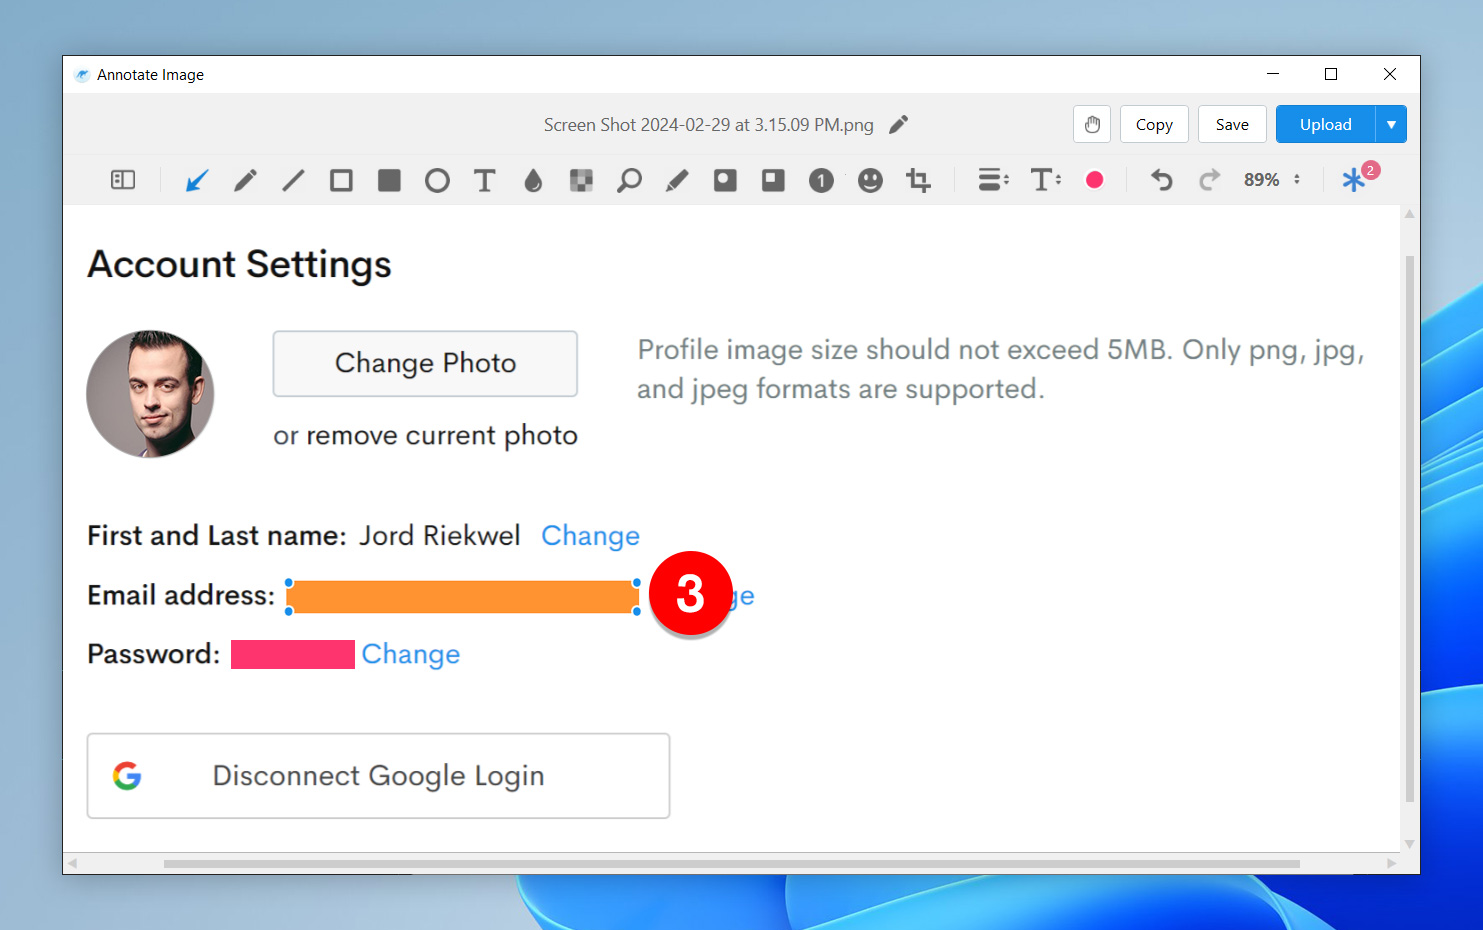
3. You can now edit these redaction marks individually. Click on any redaction mark in the screenshot and use the handles to adjust its size and shape, drag it around to change its position, pick another color for it from the toolbar above, or hit Delete to remove it entirely.
Note that partially obscured instances of sensitive information in your images or screenshots may at times remain unhidden. You may have to hide such instances manually. Always double-check your screenshot or image for unhidden sensitive info before you share it with others.